We have a Magento shop and want BDD-tests for our system - locally and later on server side. How can I setup an Behat environment on my mac with MAMP?
1 Answer
This is my first try to setup Behat Magetest for Magento on my MacOS - my tests run quite well and I want to share my experience.
First of all you should download MAMP Pro and Magento, if you did not do it already. It works without MAMP too - but that is how I did it - so feel free to work without MAMP. My final tests are based on the sample data provided by Magento, so get them as well.
- System: Mac OS X El Capitan (10.11.3)
- MAMP Pro: 3.5 (sorry for german interface screenshots in MAMP, do not know how to set it to english)
- Magento: 1.9.1.0 , Sample Data
- Java: Version 8 Update 74
So let us start:
Setup Environment with MAMP Pro:
After installing MAMP I use the standard ports (80, 443, 3306).
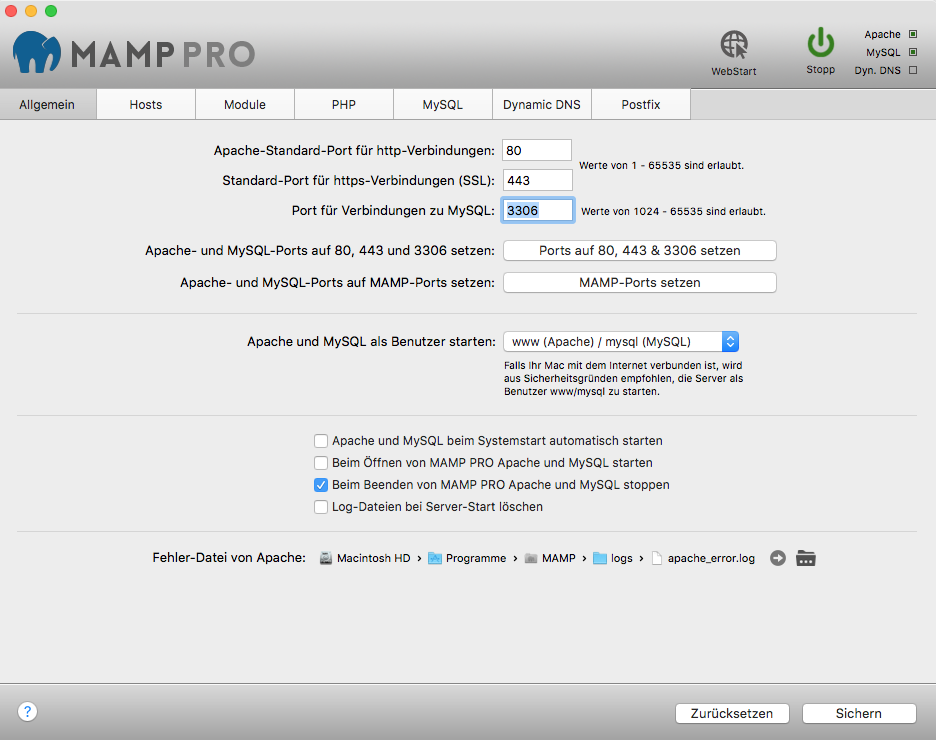
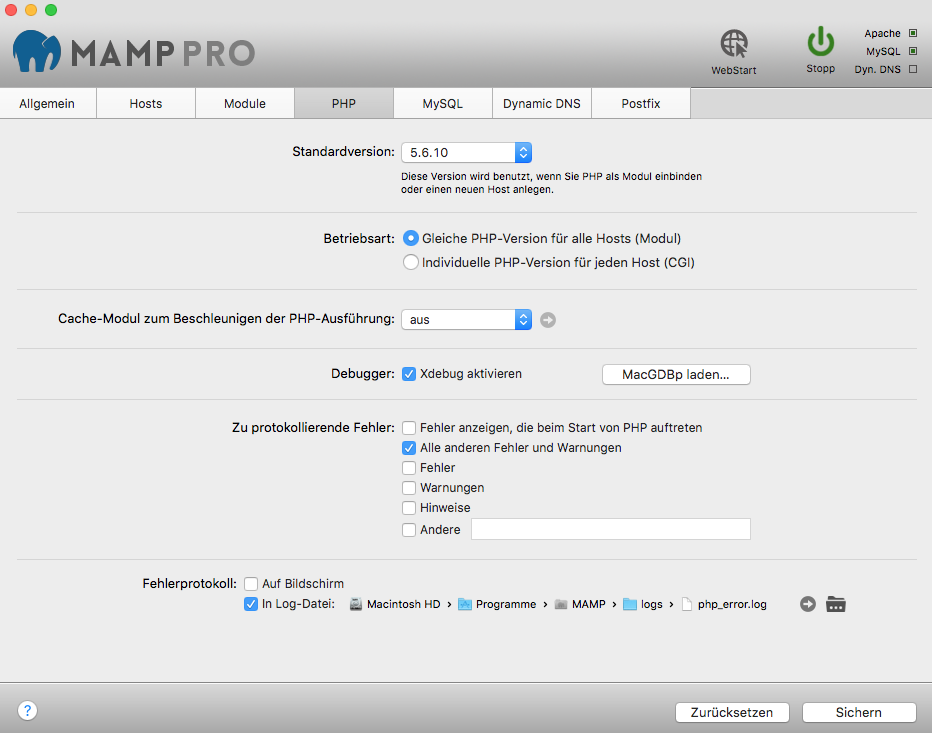
Under PHP I'm using Version 5.6.10 - I guess there won't be big differences when you take 5.4.x, but this is at least recommended. And activate xDebug - it is always nice to have a good debugger.
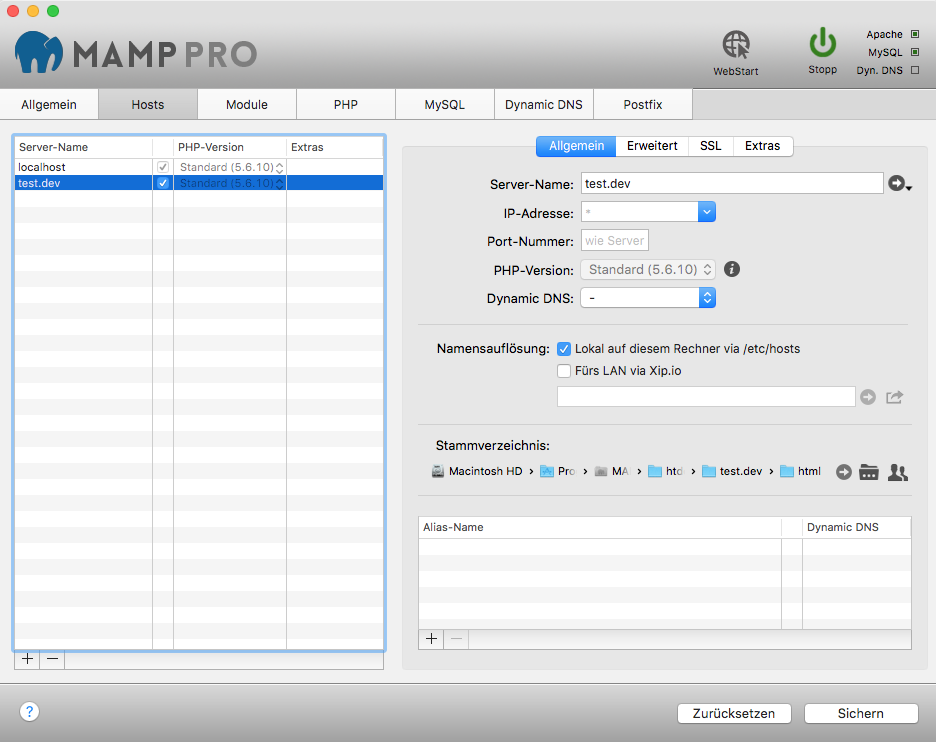
Now you go to the 'Hosts'-tab and create a domain called test.dev and its document root should be at /Applications/MAMP/htdocs/test.dev/html.
Since we will work alot with CLI we need MAMP Pros PHP run there as well. Use following command in your CLI:
export PATH=/Applications/MAMP/bin/php/php5.6.10/bin:$PATH
You can put this line into your home folder/.bash_profile so you do not need to do this every time again.
If you do not do this you will have database connection problems.
Now start your web and database server.
Setup Magento
Before you copy any Magento data use this command in your CLI and restart your finder (ALT+Rightclick). Now you can see hidden files as well like .htaccess.
defaults write com.apple.finder AppleShowAllFiles YES
You downloaded Magento 1.9.1.0 and the Sample Data and extract them in your document root (/Applications/MAMP/htdocs/test.dev/html). Then you create a database e.g. testdb and import the sql from the sample data.
Now you can open http://test.dev in your browser and you should see the installation process of Magento. That should be quite easy to finish.
If any errors occur: check your file and directory access. With MAMP you can change all the access rights to user www.
Setup Behat with composer
Composer is a tool that installs software with all dependencies. You will love it!
Now install composer:
php -r "readfile('https://getcomposer.org/installer');" > composer-setup.php
php -r "if (hash('SHA384', file_get_contents('composer-setup.php')) === 'fd26ce67e3b237fffd5e5544b45b0d92c41a4afe3e3f778e942e43ce6be197b9cdc7c251dcde6e2a52297ea269370680') { echo 'Installer verified'; } else { echo 'Installer corrupt'; unlink('composer-setup.php'); }"
php composer-setup.php --install-dir=/usr/local/bin --filename=composer
php -r "unlink('composer-setup.php');"
Now create the behat installation file for composer composer.json in your project root - NOT webroot - it should be one level above webroot.
Your directory tree should look like this:
test.dev (project directory)
├── composer.json
└── html
    ├── app
    ├── downloader
    ├── index.php
    ├── js
    ├── skin
    ├── var
    └── ...
Now we configure the installation of behat in our composer.json file:
{
  "require": {
    "php": ">=5.4.0"
  },
  "require-dev": {
    "behat/behat": "3.0.*",
    "magetest/magento-behat-extension": "dev-feature/Behat3",
    "bossa/phpspec2-expect": "~1.0",
    "peridot-php/webdriver-manager": "dev-master",
    "behat/mink-selenium2-driver": "*",
    "behat/mink-goutte-driver": "1.1.*",
    "emagister/selenium-server": "2.*"
  },
  "config": {
    "bin-dir": "bin"
  },
  "autoload": {
    "psr-0": {
      "MageTest\\PhpSpec\\MagentoExtension": "src",
      "": [
        "html/app/code/local",
        "html/app/code/community",
        "html/app/code/core",
        "html/app",
        "html/lib",
        "features/bootstrap"
      ],
      "Mage" : "html/app/code/core"
    }
  }
}
Hint: html/app/code/local is only needed if you have own modules/features - at the moment it should not exist.
Now you can run composer and it will install all needed packages:
composer install
If you change anything late, just use this instead of install:
composer update
Now your directory tree should look like:
project-dir
├── bin
│   ├── behat
│   ├── manager
│   ├── phpspec
│   └── selenium-server.jar
├── composer.json
├── composer.lock
├── htdocs
│   ├── app
│   ├── downloader
│   ├── index.php
│   ├── js
│   ├── skin
│   ├── var
│   └── ...
└── vendor
    ├── autoload.php
    ├── behat
    ├── magetest
    └── ...
Very good - now we can finally setup behat! We create a behat.yml file in our project directory with following content:
default:
    suites:
        site:
            paths:    [ %paths.base%/features/site ]
            contexts:
                - SiteContext
        system:
            paths:    [ %paths.base%/features/system ]
            contexts:
                - SystemContext
    extensions:
        MageTest\MagentoExtension\Extension: ~
        Behat\MinkExtension:
            base_url: http://test.dev/
            selenium2:
                browser: chrome
Hint: You REALLY have to be carefull with copy paste this code from internet. Because it is like Python - every indent space is important and other white spaces will cause strange behaviors. I use 4 indent spaces.
We start with two suites, because I want have backend tests for our system and frontend tests for our webpage. Of course you can do as many suites as you want - just check the documentation.
Now we initialize our behat environment with:
bin/behat --init
Your directory tree should look like:
project-dir
├── behat.yml
├── bin
│   └── behat
├── composer.json
├── composer.lock
├── features
│   ├── bootstrap
│       ├── SiteContext.php
│       └── SystemContext.php
│   ├── site
│   └── system
├── htdocs
│   ├── app
│   └── ...
└── vendor
    ├── autoload.php
    └── ...
Before we define our first tests let us finish the last two steps of setup the environment.
I want work with Chrome instead of Firefox. That is why our selenium server needs this information. Now we need the chromedriver and since I am really lazy and I really like installation scripts, we get homebrew and install it with this package dependency tool (somehow I did not find chromedriver package for composer):
/usr/bin/ruby -e "$(curl -fsSL https://raw.githubusercontent.com/Homebrew/install/master/install)"
brew install node
brew install chromedriver
ln -sfv /usr/local/opt/chromedriver/*.plist ~/Library/LaunchAgents
launchctl load ~/Library/LaunchAgents/homebrew.mxcl.chromedriver.plist
To start our selenium server we need Java. After installing it you can run following command in a new terminal window:
java -jar bin/selenium-server.jar
Do not close this terminal window or the server will be shut down. It is cool to read a few lines and get more information about what this server does actually.
That is it! Webserver + database + Selenium server is running - good job!
Define first tests
Since I started this project with this howto I will use the test cases as well.
Create a check_baseurl.feature file in your test.dev/features/system folder with following content:
Feature: Testing that behat and magento are working together
  In order to continue working on Magento
  As a magento developer

  I need to be able to configure behat and magento

  Scenario: Base URL is configured in the database
    Given there is a base_url configuration option set
    Then I should see the value being "http://test.dev/"
When you run following command behat will create all necessary methods in your SystemContext.php file:
bin/behat --suite=system --append-snippets
Now you should see that behat created two methods in your SystemContext.php:
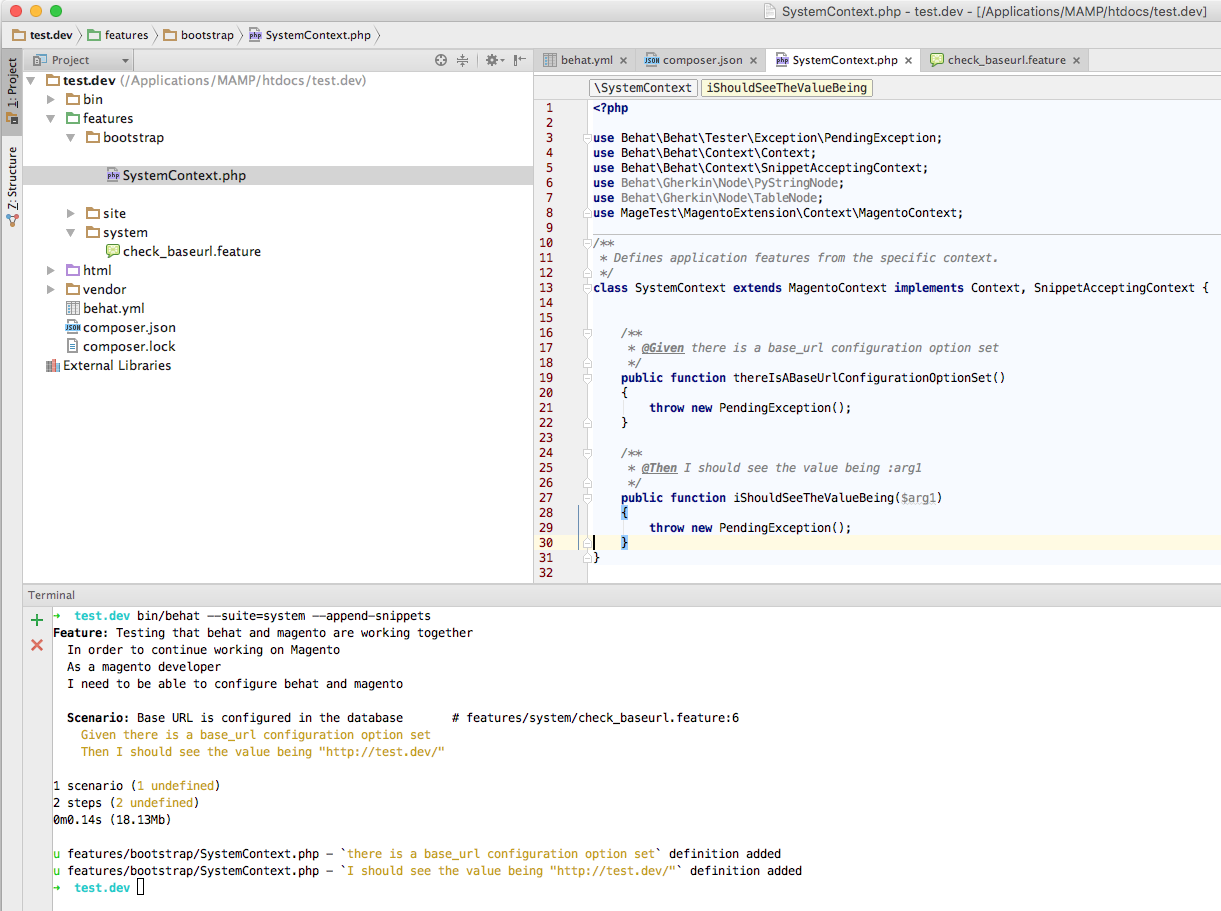
Now we complete our functions and our SystemContext.php should look like:
<?php

use Behat\Behat\Tester\Exception\PendingException;
use Behat\Behat\Context\Context;
use Behat\Behat\Context\SnippetAcceptingContext;
use Behat\Gherkin\Node\PyStringNode;
use Behat\Gherkin\Node\TableNode;
use MageTest\MagentoExtension\Context\MagentoContext;

/**
 * Defines application features from the specific context.
 */
class SystemContext extends MagentoContext implements Context, SnippetAcceptingContext {


    /**
     * @Given there is a base_url configuration option set
     */
    public function thereIsABaseUrlConfigurationOptionSet()
    {
        $this->baseUrl = Mage::getBaseUrl();
    }

    /**
     * @Then I should see the value being :arg1
     */
    public function iShouldSeeTheValueBeing($arg1)
    {
        expect($this->baseUrl)->toBe($url);
    }
}
Hint: Best is to copy & paste this code to your SystemContext.php because the class extends now from MagentoContext as well.
Now - excitement! - we run our first Behat test:
bin/behat --suite=system
Awesome!
Now we see our finish line already! Next test is in our chrome browser!
We create now item_to_cart.feature in our test.dev/features/site/ folder with following content:
Feature: Visitor can add items to the cart and shop
  In order to make a purchase
  As a visitor to the site

  I need to be able to see the product page and add the item to the cart

  Scenario: Adding the item to the cart
    Given I am on a product page
    When I add the item to the cart
    Then I should see that the total items in my basket is "1"
And run again our command to generate our methods:
bin/behat --suite=site --append-snippets
You should see three new methods in your SiteContext.php file - fill them with life:
<?php

use Behat\Behat\Tester\Exception\PendingException;
use Behat\Behat\Context\Context;
use Behat\Behat\Context\SnippetAcceptingContext;
use Behat\Gherkin\Node\PyStringNode;
use Behat\Gherkin\Node\TableNode;
use MageTest\MagentoExtension\Context\MagentoContext;

/**
 * Defines application features from the specific context.
 */
class SiteContext extends MagentoContext implements Context, SnippetAcceptingContext {

    /**
     * @Given I am on a product page
     */
    public function iAmOnAProductPage() {
        $this->getSession()->visit(Mage::getBaseUrl() . 'accessories/eyewear/aviator-sunglasses.html');
    }

    /**
     * @When I add the item to the cart
     */
    public function iAddTheItemToTheCart() {
        $this->getSession()->getPage()->find('css', '.add-to-cart-buttons .btn-cart')->click();
    }

    /**
     * @Then I should see that the total items in my basket is :total
     */
    public function iShouldSeeThatTheTotalItemsInMyBasketIs($total) {
        $pageTotal = $this->getSession()->getPage()->find('css', '.count')->getText();
        expect($pageTotal)->toBe($total);
    }
}
Hint: I had to add another css class to iAddTheItemToTheCart function because otherwise selenium would tell us that the button is invisible. Because there are two buttons on this page with same .btn-cart css class and the first one is display:none. I do not know why it worked in this howto.
And finally fire:
bin/behat --suite=site
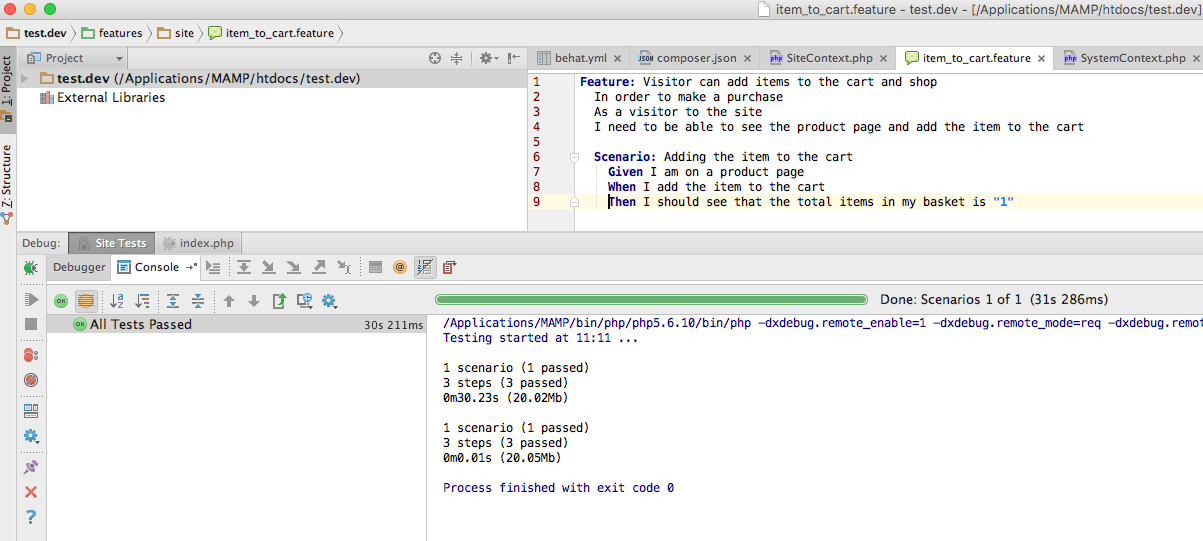
Awesome! A Chrome instance should open and do the test stuff while you lean back and watch and a few seconds later you should see something like this:
That's it! Really! Now you can write many cool tests and expand your test environment.
Hint: since this is my first try to install behat by my own, there might be a better configuration - feel free to edit any parts.
